4. How to Use batplot
General Command Structure
batplot command follows this pattern:
Component
Description
path/
Optional. A folder path when data is not in the current directory. batplot looks for supported files in that folder.
files...
One or more data files to overlay.
keywords
Special keywords: allfiles (all supported files), allxyfiles (only .xy), allnorfiles (only .nor), etc.
--flags
Options that control mode, axes, styling, and output. All flags use the double-dash (--) prefix.
Getting Help
To see batplot help and documentation:

Figure 6: Help message
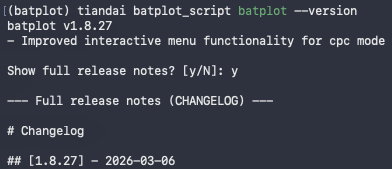
Figure 7: Version check
Recommended Workflow
As navigating to different paths can sometimes be tedious, you can create a folder named "Figures", and use cd to navigate to this "Figures" path. Then, you can directly drag the files/copy the path into the terminal for interactive plotting. Inside interactive menu, you can easily save the plot session/export the figure/export the style/import a style from the "Figures" folder as batplot automatically detects your terminal path and use that to save or find relavant files. For example:
Selecting Modes
The plotting mode is determined by which mode flag you include:
Mode
Flag(s) to add
1D / XY (default)
no mode flag needed; optional --xaxis / --wl when you want a named axis type or XRD conversion
Galvanostatic cycling
--gc
Cyclic voltammetry
--cv
Differential capacity
--dqdv
Capacity/Energy density per cycle
--cpc / --epc
Operando / contour
--operando or --contour
Histogram
--histo
The Interactive Menus
Customized interactive menus are the central feature that makes batplot unique. Add --i to any command to open a text-driven menu in the terminal alongside the live figure window. Every change you make — colors, fonts, axis labels, line widths, tick spacing — updates the figure in real time.
Full key + subkey reference (per mode — open the chapter you use):
| Mode | Where every key is introduced |
|---|---|
| 1D / XY | Ch.5 Interactive menu |
| GC / CV / dQ/dV | Ch.6 EC menu |
| CPC | Ch.6 CPC menu |
| Operando | Ch.7 Operando menu |
| Histogram | Ch.8 Histogram menu |
| Batch | Ch.9 Batch menus |
Index page: Interactive menus.
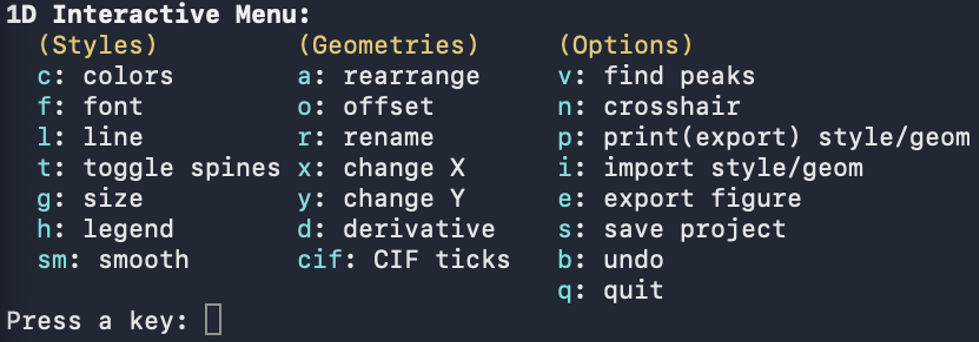
Figure 8: 1D mode
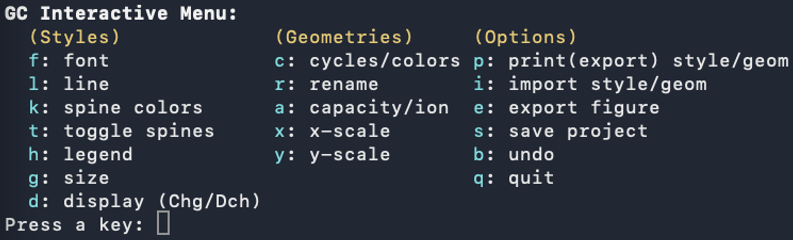
Figure 9: GC mode
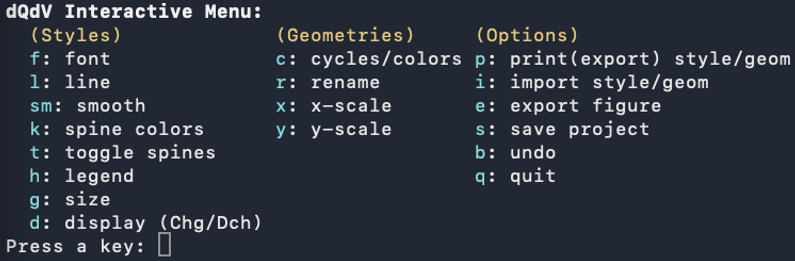
Figure 10: dQ/dV mode
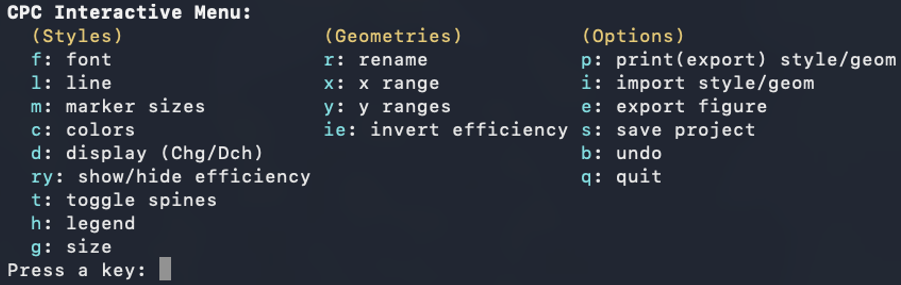
Figure 11: CPC mode
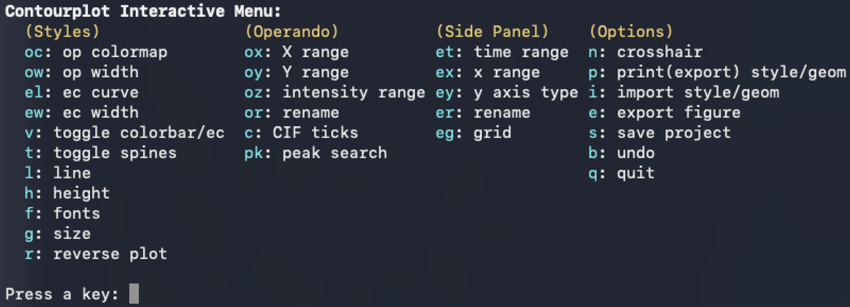
Figure 12: Operando/contour mode
Inside interactive menus you can also:
- Press
pto export style andito import (.bps/.bpsg; histogram.bpsh). - Press
sto save the session as a.pklfile. - Press
eto export the figure;bto undo. - Use every mode-specific key documented in that mode’s chapter (links in the table above).
Useful prep utilities before plotting: --showcol, --strip-header, --convert (2θ / Q / d export). For exporting every file in a folder as its own figure, see --all batch export. For editing many saved sessions at once, see Batch mode.
Note
By default, style files (.bps, .bpsg) and image files (.svg, .png, etc.) are exported into a subfolder within the selected path, while session files (.pkl) are exported directly to the selected path.
When using i to import a style file, batplot automatically scans the style subfolder in the current path, lists the detected files with numbers, and allows you to select a file by typing its corresponding number.
Download Tutorial Files
Below sections are some examples of how to use batplot, you can find the demo files in this link.